Calisthenics Leg Workout + Top 9 Leg Exercises
You can't grow your legs with Calisthenics! That's what many people say & claim, but is it a reality?
Definetly not! Of course, doing endless amounts of Squats will not make your legs big but rather train your endurance. But quite a few forget about the fact that there are challenging bodyweight leg exercises in Calisthenics.
Before getting into the workout, you need to understand & get to know the most vital exercises for your hamstrings, hip flexors, glutes & quads.
Other than that, here are the essential exercises and how to do them, sorted by difficulty!
Squats
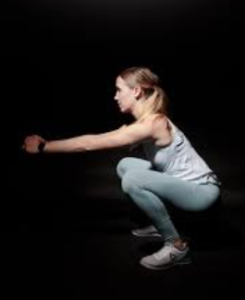
Everybody knows what a squat should roughly look like, but I want to point out some key aspects:
- Never Point your knees, outwards!
- Keep your back straight!
- Get your ass to the floor!
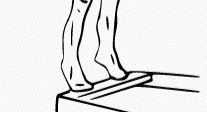
Calf Raise
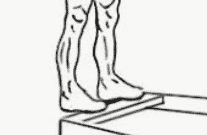
Stand on an edge with your heels in the air, then slowly move your heels further up in the air while getting on your toes. Your legs must remain straight during the exercise while you engage your calves as much as possible.
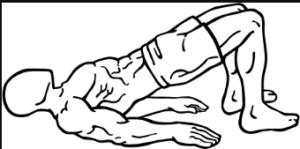
Glute Bridge
Lay down on your back with your legs bent and your arms next to your upper body. Slowly begin pushing your hips up, until you can't go any further. Hold this position for 1-2 seconds before slowly bending your hips back to the starting position.

Lunges
Start with both feet at shoulder-width apart & standing upright. Then take a big step forward with one leg, you should be on your toes with your back leg, while the entire front foot should be on the floor.
Begin bending your legs while pushing your hips as far forward as you can. Go down until your knee gently touches the ground and push yourself up again.
Then go back into the starting position and take a big step forward with the other leg.
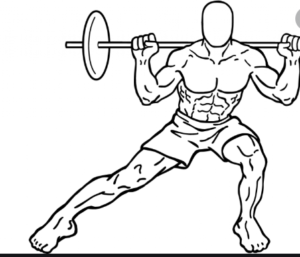
Side Lunges
Side lunges are an excellent hamstring & leg mobility and strength exercise. Begin in a wide stance; then slowly lower yourself down diagonally. Focus on keeping the opposite leg nearly straight the entire time, even while pushing up again!
Once you're back in the starting position, you repeat the exercise.
Single-Leg Glute Bridge
The single-leg glute bridge is similar to a regular glute bridge but with only one leg extending your hips.
Lift the other leg off the floor and keep it straight while making it a point towards the ceiling. Focus on keeping both your hips & knee as stable as possible throughout the entire exercise.
Single-Leg Calf Raise
Start by standing on an edge with only one leg supporting your weight. Your heel has to be in the air throughout the entire motion.
Try to get your heel as close to the floor as possible and then slowly lift it as high up as you can by contracting your calves.
If the exercise is too hard, you can use your hands to support your hands at a wall to make it a lot less challenging.
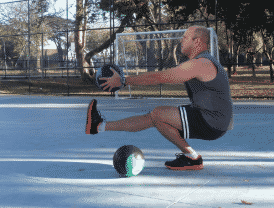
Pistol Squats
The best leg exercises for both mobility & strength is the pistol squat. The motion is very similar to a regular squat, but with the primary difference, that you're doing it on only one leg!
Start by standing upright on one leg, lift the other leg in front of you while keeping it straight. Begin lowering yourself down slowly while keeping your knee stable throughout the motion!
The other leg has to remain straight while being in front of you, which can be challenging in terms of mobility for a beginner.
Push yourself up again, with particular attention to your knee, not wobbling around! The exercise becomes a lot easier if you use a wall/chair to assist yourself with your arms.
Nordic Ham Curl
Often you hear, that the deadlift is the "hardest" hamstring exercise, especially since you can add as much weight as you need.
But if you think you've got strong hamstrings, you should try the Nordic ham curl. Find a partner or an object to lock your ankles to the floor. Start to lower your entire body down towards the floor slowly, only by the strength of your hamstrings.
Once you can't go any further with the control, you can use your arms to catch yourself before falling down. Help your hamstrings by pushing yourself up using your arms, but then perform the rest of the motion solely with your legs.
Make sure to be warm before doing this exercise since it requires a lot of strength and body tension!
The Workouts
How to read the workouts:
There are three different Systems used in the exercises below, which is why it is crucial to understand all three of them! But don't worry, it is not that hard! Especially if you are new to Calisthenics & leg training, I recommend you to begin with muscular endurance training for 3 weeks, then move to Intervals and finally supersets. By doing so, you are going to avoid unnecessary injuries.
Ladders/Stairs - Muscular Endurance
Ladders are quite simple; imagine a set of stairs that goes up on one side and then down again on the other side. So you begin with step 1, which means doing one repetition of the given exercise. Then you move to the next step, so you do two repetitions. Continue this way until you reach 6-8 repetitions. Now go down again, so if you reached your limit at 8 reps, you would now do 7 repetitions, then 7, then 6 until you're at one repetition again.
Rest for as long as it took you to do the number of repetitions between each step, so if it took you 14sec to do 7 squats then you rest for roughly 14 seconds before doing 8 squats.

Regular Intervals
Here, the workouts are divided into sets & reps; you need to be able to do at least 8 repetitions of all the given exercises in a workout to be able to do it.
Perform three sets of 8-12 repetitions of the first exercise, then move onto the 2nd exercise until you finish the workout! Remember to rest for 90-120 seconds between each set! If you want a training schedule that works on periodization & trains your entire body, you should read this article.
Supersets
Supersets are, by far, one of my favorite ways to make training more enjoyable. One exercise consists of two exercises (A & B). A is going to be a challenging exercise that you only do for 2-5 repetitions, exercise B, on the other hand, will be slightly easier, so you are going to do 8-12 repetitions.

Start by doing A, and then immediately move to B; then rest for 3-4 minutes and repeat the superset, before moving to the next two exercises!
The Warm-up:
Here is a sample warm-up routine that you can use if you don't have a warm-up yet! Never skip the warm-up since I can almost guarantee you that you will run into injuries after just a few weeks!
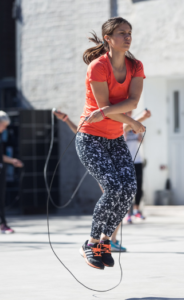
- 5 Minutes of running / rope skipping
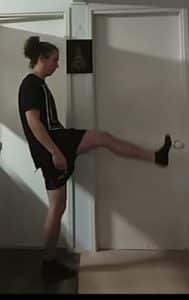
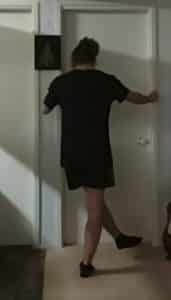
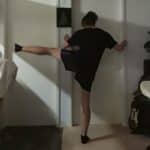
- 10 Straight Leg Swings Sideways
- 10 Straight Leg Swings For & Backwards
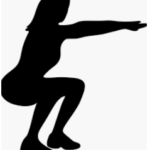
- 20 Squats
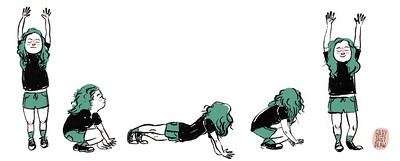
- 10 Burpees
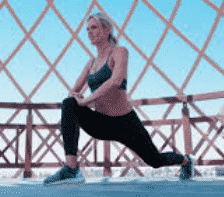
- 10 Lunges left & right side

Beginner Program:
Beginner Endurance (Ladders/Stairs) - Week 1-3
- Lunges
- Bodyweight Glute Bridge
- Squats
- Calf Raises
Beginner Strength (Intervals) - Week 4-6
- Bulgarian Split Squats
- Sumo Squats
- Side to Side Jumps
- Calf Raises
Beginner Supersets Week 7-9
A: Sprint 5-10 sec B: Jumping Squats
A: Box Jumps B: Lunges (switch sides with each step)
A: Single Leg Calf Raise B: Sumo Squats
Intermediate Program
Intermediate Muscular Endurance (Ladders/Stairs) Week 1-3
- Burpees
- Bulgarian Split Squats
- Side Lunges
- Calf Raises (go up to 8-10 reps)
Intermediate Strength (Intervals) - Week 4-6
- Wall assisted Pistol Squats
- Box Jumps
- Side Lunges
- Bodyweight Glute Bridge
- Single-Leg Calf Raises
Intermediate Supersets Week 7-9
A: Pistol Squats B: Box Jumps
A: Sprint (10sec) B: Single Leg Calf Raises
A: Single Leg Glute Bridge B: Side Lunges
Advanced Program
Advanced Muscular Endurance - Week 1-3
- Burpees (Do a Box Jump Instead of a regular Jump!)
- Negative Nordic Hamstring Curls
- Pistol Squats
- Single-Leg Calf Raises
- Single-Leg Glute Bridge
Advanced Strength (Intervals) - Week 4-6
- Nordic Hamstring Curls
- Pistol Squats
- Single-Leg Calf Raise (No Wall-support & go down slowly!)
- Sprinting uphills (10sec)
- Bodyweight Glute Bridge (feet elevated)
Advanced Supersets - Week 7-9
A: Nordic Hamstring Curl B: Pistol Squats
A: Single Leg Glute Bridge (Foot Elevated) B: Single Leg Calf Raises
A: Sprint Uphills (10 sec) B: Pistol Squats
How Often Should You Train?
Now that you've got a workout that is adjusted to your skill level, it's vital to know how often to do this workout! Overtraining & "undertraining" are both equally bad and will lead to stagnation or even a decrease in strength. Since the recovery time that you need depends on your age, strength level & experience, it is difficult to tell how often you should train to see results quickly. But this is my advice;
Beginners
As a beginner, it is essential to give your body enough rest & time to adapt to any new muscular stimulus. Therefore I recommend you to do this leg workout 1-2 times per week.
Intermediate
If you're intermediate, I would try to incorporate 2 leg days per week, since you might already start losing your gains if you only train once per week. But training your legs more often is not necessary!
Advanced
Even as an advanced athlete, you should give yourself at least 1 day of rest between each leg training if you want to be able to give 100% every session. Therefore training 3x per week is going to be enough!
If you want to learn more about frequency, the first step would be to understand supercompensation.
Conclusion:
Honestly, I didn't even plan to go so far in detail, but I hope that this article did not overwhelm you. If you have any questions regarding the training methods or exercises, you should leave a comment below!
I'm sure this calisthenics leg workout for mass, endurance & explosive strength will get you results quickly if you focus on perfect execution & consistency!
Besides that, I hope that you try out the workouts and follow them for the entire 9 weeks! In case you feel like sticking with one training method for 3 weeks is too long & tedious, you can try to move towards the following method after 2 weeks as well!
Please share this article with your friends, as this is important to keep this website alive!
